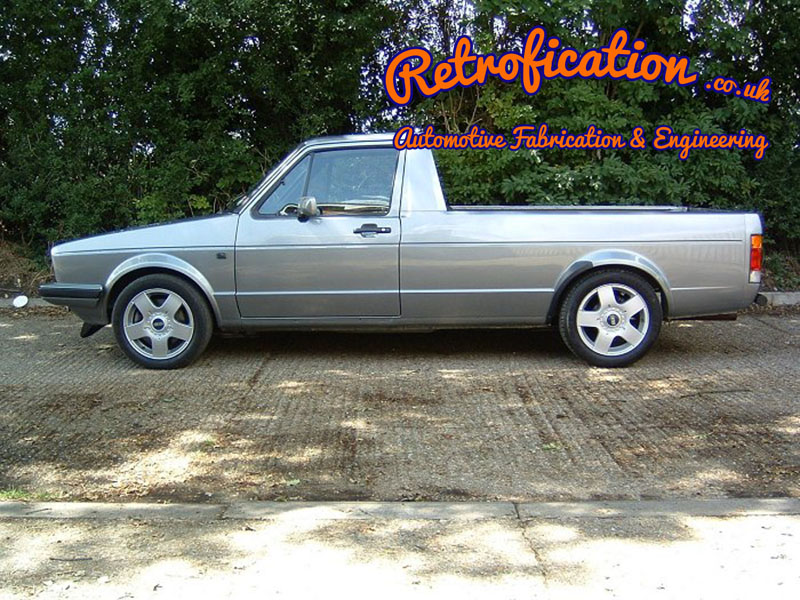
MK1 Caddy Axle Flip25 September 2017 | Admin MK1 Caddy Axle Flip (Lowering)
What is an axle flip I hear you ask??? The term “axle flip” was originally used by the Hot Rodders in the USA just after the second world war, when they relocated their axles from beneath the leaf springs, to above the leaf springs! Thus, lowering the rear of the vehicle by the axles diameter and thickness of the leaf springs combined. On a MK1 Caddy, this amounts to around 100mm (4”) give or take.
Please do not confuse the Americanism word “flip” as you are not actually flipping anything! I have seen some shocking lowered Caddys at shows and in the workshop where the word flip has been taken literally!!! So, just to reconfirm you will be “relocating” the axle on top of the leaf springs in the same plane as your axle currently sits now. So, if you follow this tutorial, you will not go far wrong!
Important preparation, please read Retrofication will take no responsibility for your workmanship. If you are at all in any doubt, then get a professional to do this work for you.
This “how to”, will presume you are competent with spanners and can weld or have somebody on hand to do the welding for you.
I won’t go into too much detail on the removal and refitting of the axle, I will only cover the main points in completing this conversion.
The time taken to do this will depend on your skills and problems you may encounter along the way, some bolts can be very stubborn and are likely to snap no matter what you do! So be aware and make sure you have enough time set aside for any drawbacks.
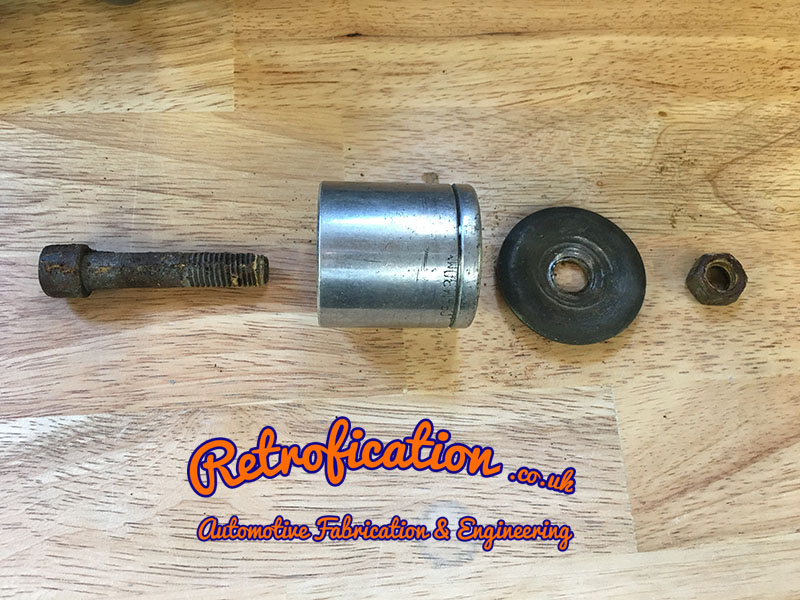
Parts required: Offset Saddles & Compensator Bracket To do this job properly you will require some of our weld-on, offset spring saddles. We first standardised the lowering of the rear of the Caddy many, many years ago by either cutting off and re-welding the original saddles or by modifying RWD Ford saddles to fit. Neither of these solutions were perfect so we set about designing the offset spring saddles which have become the norm today. The inherent problem with the “axle flip” on a MK1 Caddy is that when the axle is moved upwards, it also moves forwards! Now, not does this just look wrong with your wheels sitting so far forward in the arch, it also promotes tyre rubbing on the leading edge of the wheel arch. The offset saddles we manufacturer will overcome this problem:
Correct offset, wheel sitting central in the arch
Without Compensator https://www.retrofication.co.uk/MK1springsaddle.html With Compensator https://www.retrofication.co.uk/MK1springsaddlecomp.html Whether you need a compensator bracket or not will depend on your chassis. The early pre-1987 Caddys did not have the weight compensating bias. There is a chassis number cutoff, but the easiest way to tell is by poking your head under the back of your Caddy, if your axle has a vertical bar pointing upwards (normally attached to a large spring but these are often missing) towards the left hand side then you will need the compensator bracket.
U-Bolts (optional)
In my experience wire brushing & lubricating the U-Bolts in advance is a waste of time! If they are going to snap, they will, the only thing that may help you is some heat if you have access to oxy acetylene or similar! So, if you are limited on time then make sure you have a new set of u-bolts to hand, which you can find in our shop here:
https://www.retrofication.co.uk/ubolts.html
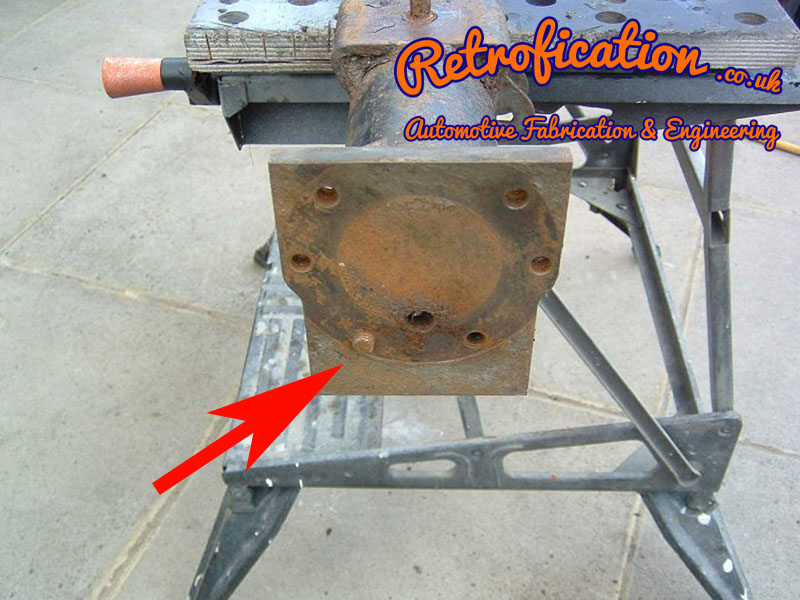
Stub Axle Bolts (optional) Also in their wisdom VW decided that 6x M8 bolts were better on the European & South African Caddys over the normal 4x M10 bolts fitted to all other VW’s including the US Built Rabbit Pickup! What this means to you & I is that over time these small bolts rust themselves to the axle end plates, which then snap on removal! If you do manage remove the stub axles without snapping any of these bolts, then count yourself lucky as that is not the norm! In my experience you are likely to snap 2-3 bolts, so again if you are limited on time it would be a good idea to stock up on new bolts which can be found here (You will also need some decent cobalt drill bits and a tap):
https://www.retrofication.co.uk/stubaxlebolts.html
Rear Dampers (Recommended)
You can get away with using your original dampers (if you haven’t used lowering blocks), for a short period of time! The problem with the original dampers are:
1. The dampers will overheat as they will only be operating at the end of their travel and will wear out quickly. 2. Due to the increased angle of the damper they will now be under-rated! 3. They are most likely tired anyway and in need of a change.
We currently offer 2 types of damper that are designed for the MK1 Caddy. Both are excellent, reliable and do a good job. The Konis are adjustable and are ultimately better as you would expect from such a large manufacturer, but don’t let that put you off the T/A units if you are on a budget.
T/A https://www.retrofication.co.uk/mk1tarear.html Koni https://www.retrofication.co.uk/Koniredmk1.html PLEASE NOTE: We often read on Forums or other social media, people recommending old air cooled Beetle dampers! It makes me cringe every time I read those type of comments! Yes, there are many dampers out there that will “fit”, but dampers actually have a job to do, just because it “fits”, it doesn’t mean they are up to the job! Cut corners here and your Caddy WILL drive and handle like and old nail. The dampers job is to iron out the oscillation of the road springs, so dampers are matched to the spring rate. Beetle or any other dampers have a lesser spring rating than the Caddy leaf springs, and when you combine this by leaning the damper over at 45 degrees the problem is exaggerated. So, for the sake of you Caddys handling & safety, DO NOT use Beetle dampers (or any other damper not designed or rated for the job).
Lowering Blocks (Optional) I am often asked what size block would I recommend! This is an impossible question to answer as there are so many variables, from what you will be using the Caddy for and the tyre/wheel size, as well as the offset (ET) etc etc.
If you are unsure, what I would normally recommend is that you lower the rear of you Caddy with a standard “axle flip” first, let it settle with your intended wheel/tyre combo, and then have a measure from that point. Then you can decide what size block you require (if any).
To fit lowering blocks, you will need the extended U-bolts if you don’t already have them, so for that reason we offer the blocks with and without the U-bolts. Also, we have manufactured our bespoke Caddy blocks so that the axle remains secure (unlike the budget/Ford blocks which we no longer sell), and also offer an off-set if you do not already have out offset saddles.
Lowering Blocks https://www.retrofication.co.uk/offsetblocks.html
Extended Shackles (Optional) As mentioned above, the “axle flip” will lower your Caddy approx. 100mm. This is a fixed amount, its either / or.
Its worth mentioning at this point that shackles raise the suspension, and not lower it
In some cases longer extended shackles are required on the MK1 Caddy, for example: 1. Your running larger wheels/tyres an 100mm has lowered to much 2. You have a Caddy Sport which started life lower than a standard Caddy so an axle flip is to low 3. You like your Caddy low, but occasionally carry loads so need to be able to raise the rear 4. Drag racing! Again if you like your Caddy low, but for drag racing raising the rear will help with traction.
We offer the shackles in two different lengths: https://www.retrofication.co.uk/shackles.html
Rear Wheel Cylinders (Optional) See below, but depending on how you dismantle your axle, you may, or may not have to bleed the brakes. If you choose the route in which your brakes require bleeding, then check your current wheel cylinder nipples are not seized.
Wheel cylinders https://www.retrofication.co.uk/rearwheelcyl6n0611053.html Tools This will vary, and impossible to do a complete list, but just be prepared, over and above a normal tool kit it will be worth having the following to hand: 1. Cobalt drill bits 2. M8 Tap 3. Brake pipe clamps 4. Breaker bar
Ok, so now you have an understanding of what parts may or may not be required its time to make a start!
AXLE REMOVAL There are two different ways you can approach this, depending on what tools or risks you wish to take: Is to remove the brake pipes and stub axles, backing plates as one unit. This saves you having to bleed the brakes afterwards. Once removed they can be held up out the way with bungees etc. Is to disconnect the flexible brake hoses from the axle, this way you will not disturb the stub axle bolts. The only downside is that it makes welding the axle a little more tricky, and fitting the axle over the springs & between the chassis requires a bit of “jiggery pokery”. Also the brakes will need to be re-bled, so its worth checking the bleed nipples are not seized at this stage
1. Loosen the rear wheel bolts
2. Jack up the rear of your Caddy safely, and put axle stands under the chassis jacking points (NOT AXLE), and chock the front wheels
3. Remove wheels, brake drums, handbrake cables & Compensator spring
4. Clamp the two flexy brake pipes, if going the option 2 route. 5 if going the option 1 route, then remove the bracket which holds the brake pipes to the axle. The Philips bolt holding this will need removing with an impact driver or a chisel!
6. Undo the dampers from the axle 7. If going the “non bleed” option 2 route, then you will need to remove the dreded M8 bolts holding on the stub axles. Before you take a socket to them, I have a couple of tips to help get better results. A) Hit the bolt heads hard with a large drift & hammer B) Heat the bolts from the axle side with Oxy acetylene or a blow torch. C) If you have one gently use an impact gun on a low setting to remove the bolts, this will help shake them loose.
But as I said at the beginning of this tutorial, if they are going to snap they will, the above just stacks the odds in your favor slightly.
Option 2: Carefully bend the metal tabs holding the brake pipes to the axle (these also snap).
8. Now place a trolley jack under the middle part of the axle with approx. 25mm gap or so (this is just to catch the axle and stop it dropping to the floor). 9. Now you can start to undo the 19mm U-bolt nuts, you will need your breaker bar for this, if you have new u-bolts to go on, and prefer, you can choose to cut the old u-bolts off with a disc cutter to save time.
8. At this point you should be left with the axle hanging from the springs and hovering just above the jack! The axle is now only connected to the leaf springs by the locating pin, this is probably rusted to the axle, but it doesn’t matter as this pin needs to be removed anyway, you will find the nut on top of the springs is easy enough to remove (sometimes the nut will just turn with the pin which is fine so don’t worry, because that has now free’d up the pin in the axle). If your axle has not come loose at this point then gently tap the pin downward / and or pry the axle away from the springs.
Your axle will now be free from the Caddy
9. Also worth mentioning at this point is that when you remove all these parts make a mental note where everything goes, also you will now see how the locating pins work etc
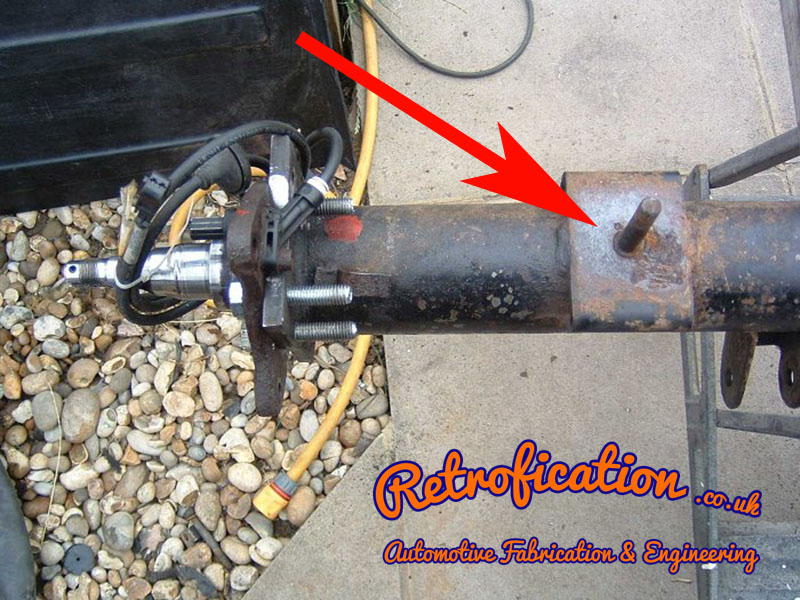
In this picture you can see the locating pin rusted to the axle saddle, this can be drawn out with a large socket & washer and the original nut that you removed from the pin
Modifications 1. Secure your axle in a vice or somewhere suitable 2. Cut off the compensator bar if fitted 3. Drill and re-tap the bolt holes for any bolts that broke off on removal, if applicable (use the stub axle to get the holes lined up).
Its worth noting at this point to save you time; I have tried every way possible to removal the broken bolts out of the axle by welding on nuts, using oxy acetylene etc. etc. etc. You name it I have tried it. But in the long run I have always found it quicker & easier to drill & tap new holes. Sometimes you get lucky when drilling the bolt and it becomes loose on the thread, but don’t bank on it!
4. Now it’s time to weld on the spring saddles. Note, that when the axle is sitting on top of the leaf springs, the offset hole should be towards the front of the Caddy, thus moving the axle rearwards.
The saddles should then be welded 180 degrees and in line with the originals. There are many ways you can get them lined up, but I will leave that to you. Personally, I use an electronic spirit level which can be zero’d. If you don’t have one, you can get cheap ones on eBay/Amazon etc. If you feel you need one then you can make up your own jig or simply measure from the old saddle.
Whatever you do just make sure its level!
180 PICTURE HERE
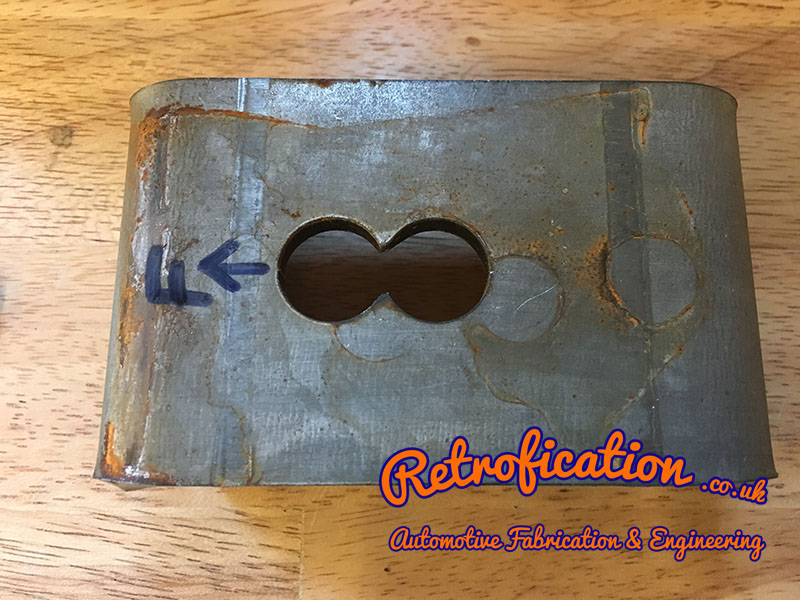
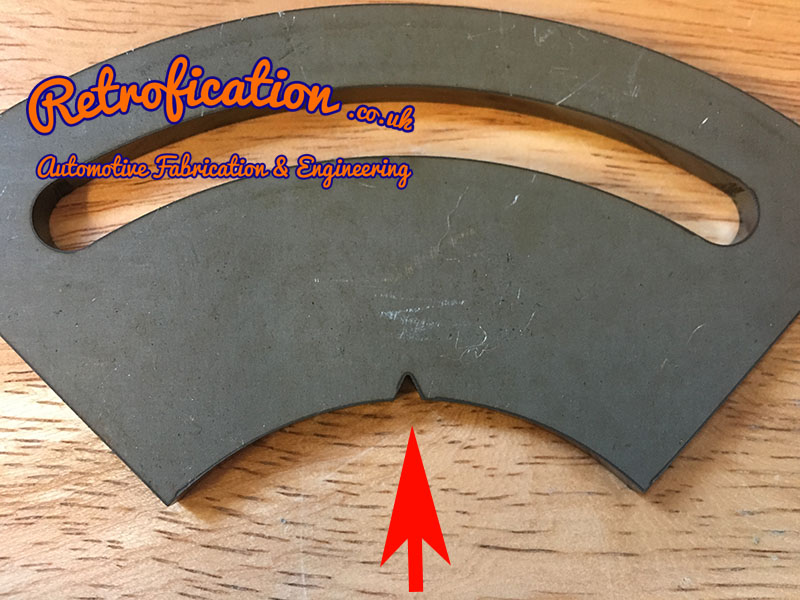
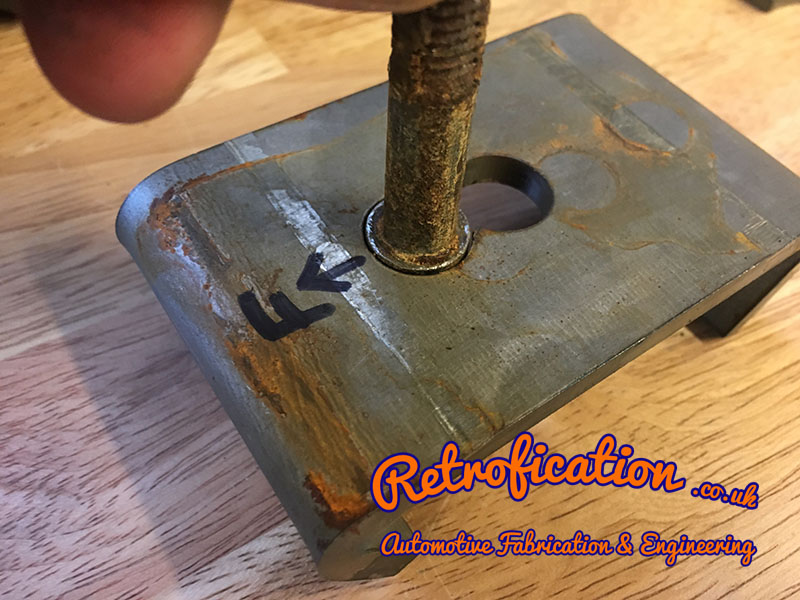
6. Not all Caddy’s will have the adjustable compensator on the axle, but if you do and have purchased the bracket with your saddles, then this now needs to be welded onto the very top of your axle from where you cut off the original. We have laser cut a “V” shape into the compensator to help you line it up. The “V” should be positioned at the top center. This isn’t a crucial measurement as we have designed plenty of adjustment into the bracket either way. Also, if not noted, the bracket should be welded on 46cm from the outside edge of the axle end plate.
46CM PICTURE HERE
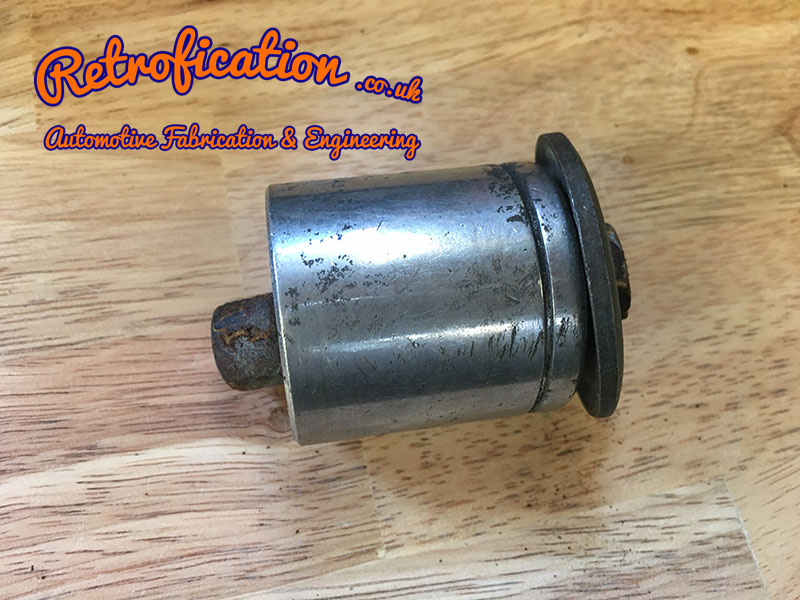
7. Now your axle has the new saddles and bracket welded on, you might as well give it a lick of paint. 8. Whilst your paint is drying push the head of the locating pin into the offset hole. You will see that it doesn’t go all the way in, so measure and cut/grind off the amount needed, so that the shoulder of the pin sits flush against the face of the saddle (or just below)
9. Your locating pin is now ready to be bolted to your leaf springs. When removed this came out the bottom of the springs. Now this needs to be place through the top so that the axle cane locate on it when re-assembled.
If you have the early multi leaf setup, you will most likely need a G-clamp or some other method to hold the leaf’s together so that you can get the nut back onto the pin.
If you have the more common later single leaf (with assister leaf) then you have a couple of options before bolting the leaf’s back together. The leaf setup on these is made up of the main leaf, assister leaf, and a short plate/spacer 125mm long. Now it does not matter if you locate this plate on top or underneath the main springs! If you mount it on top, this will lower the rear of the Caddy by an extra 13mm. If you mount it below the spring’s then you will remain at the approx. 100mm.
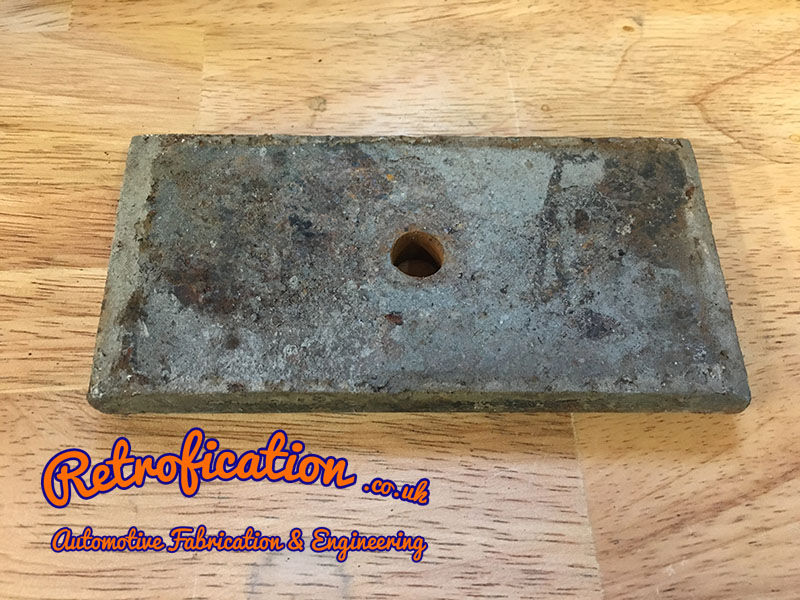
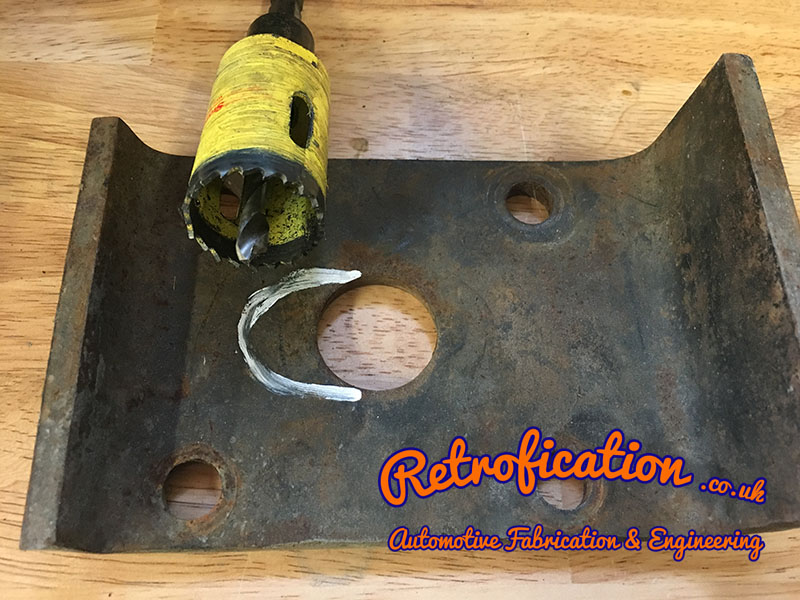
Once you have decided, you can tighten the nuts onto the springs making sure they are all straight (You will need to hold the top part of the pin with some vice grips to tighten). 10. The Caddy is now ready to receive your freshly modified axle, so lift the axle into position on top of the leaf springs making sure that the pins are located into the “offset” holes. Now if you haven’t ground down the pin correctly you will find that the axle does not sit flush on the springs! If not grind some more off the pin. 11. Now to use the offset on a MK1 (strongly recommended) you will now need to modify the U-Bolt Plate. Because of the offset, the hole in the middle of the plate needs to be elongated so that it fits, the easiest way to do this is with a hole saw in a drill which can be bought from Screwfix etc. I will be manufacturing new u-bolt plates in the very near future which will save on having to do this.
12. Now you can fit & tighten the u-bolts & the plate you have just cut to secure the axle
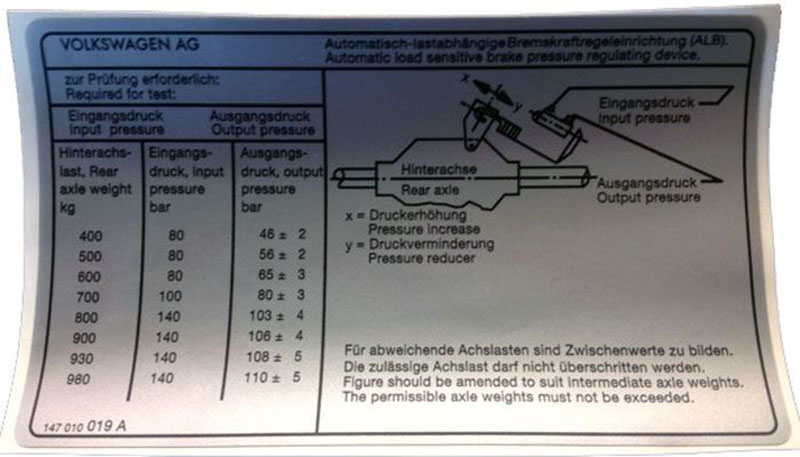
13. Now everything else is just a reversal of what you removed earlier. 14. To adjust the compensator spring, please see the diagram below
With all the options above you will be able to tailor the height of your Caddy from as little as 50mm to a whopping 163mm, now that should be enough range for 99% of you
Example 50mm = Axle Flip + Extended Shackles 163mm = Axle Flip + Spacer plate on top + 50mm Lowering Blocks
Sizes are all Approximate If you have any questions or suggestions on the above, please ask. Also, we offer an axle modification service, so if you don’t fancy the welding part of the job, you can always mail us your axle, but please note that it must be bare, and all parts removed.
|
|


