MK2 Golf / Jetta RHD Hydraulic Clutch Conversion
15 June 2021 | Admin
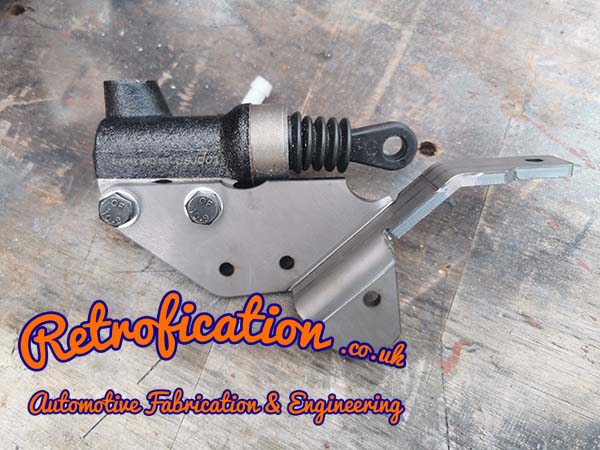
MK2 Golf / Jetta Hydraulic Clutch Conversion
Traditionally when carrying out and engine & gearbox conversion on a MK2 Golf, you had the option of using a Corrado pedalbox to enable you to convert your Golf to a hydraulic clutch. Now because of the price increases of Corrado's, these pedalboxes are now expensive to buy or difficult to get hold of in the first place! Also when using a Corrado pedalbox, the bulkhead of the Golf will need cutting & re-shaping to suit!
Our solution around this, is a largely bolt in kit that will not require the bulkhead to be modified in any way, we have designed this kit with a similar geometry to that of our MK1 kit that utilises the complete stroke of the pedal giving it a complete OEM feel (something many other companies do not take into account).
This conversion can be carried out in situ, although drilling the top hole may be a bit tricky!
1. Remove the Clutch Cable
2. Remove the "over centre" spring (depress the pedal when you do this) and discard as it will no longer be needed.
3. Remove the plastic bump stop if fitted
4. Remove the clutch pedal
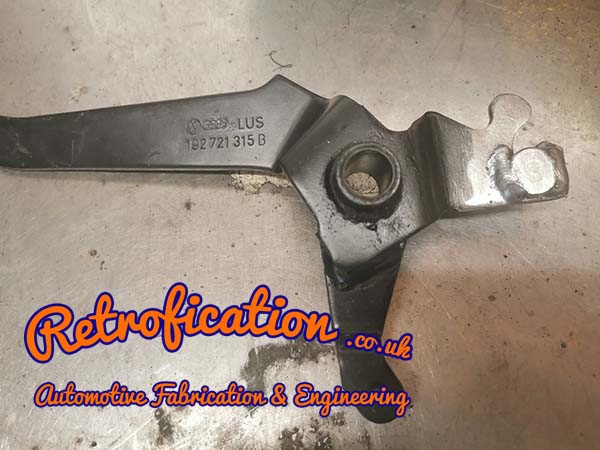
5. Remove paint from the clutch pedal and note the orientation of the pedal in the picture below. Then remove the paint from this area ready for welding the clevis pin
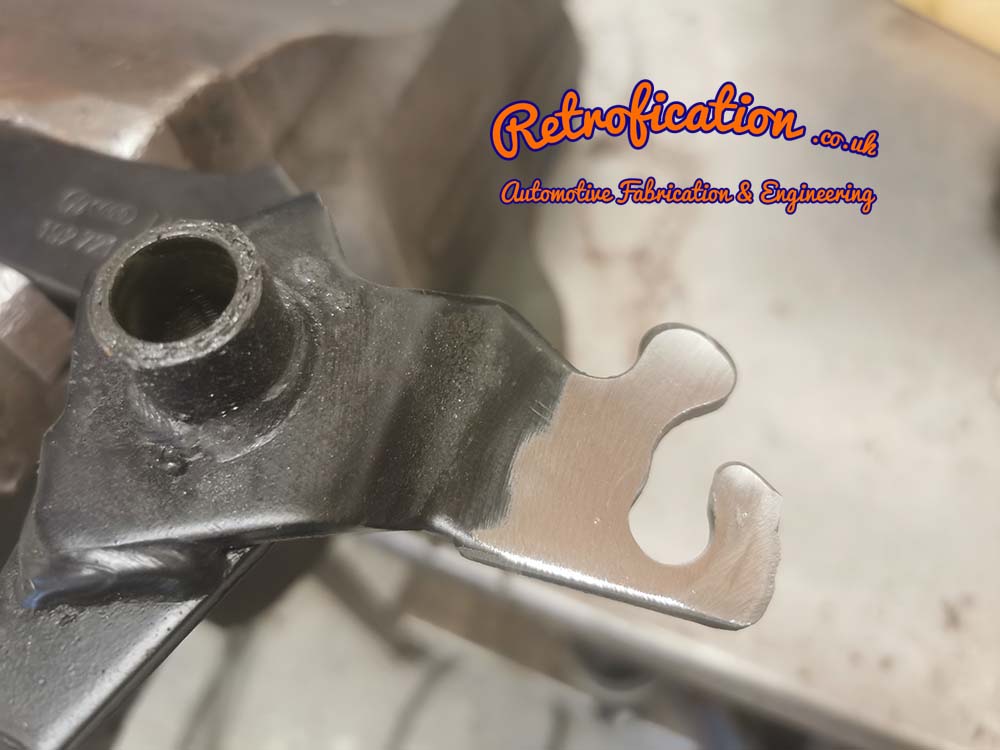

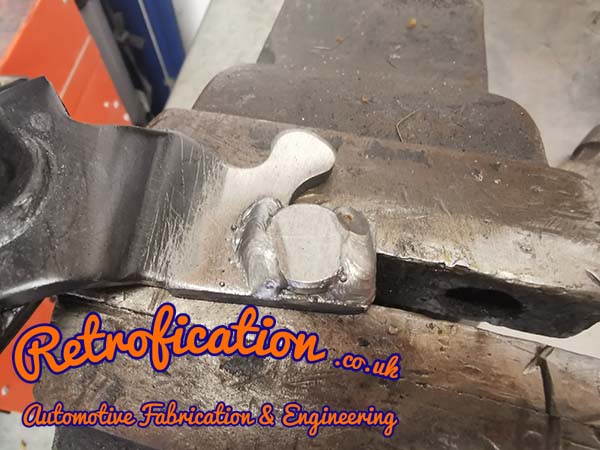
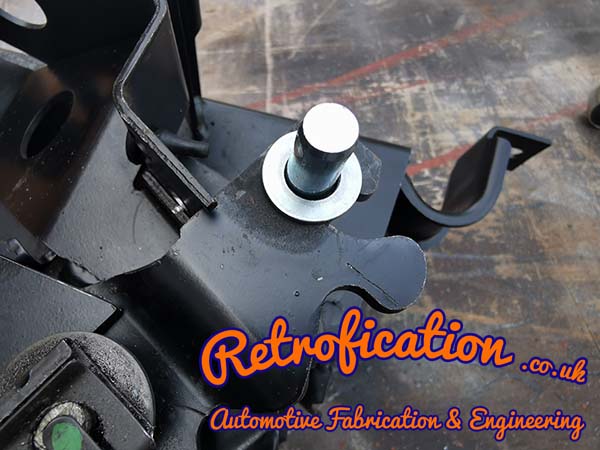
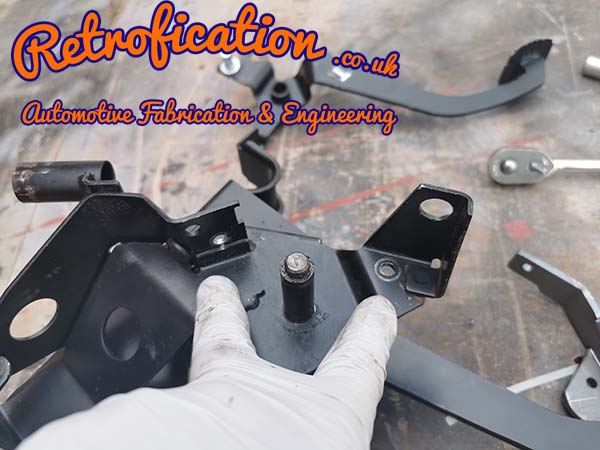
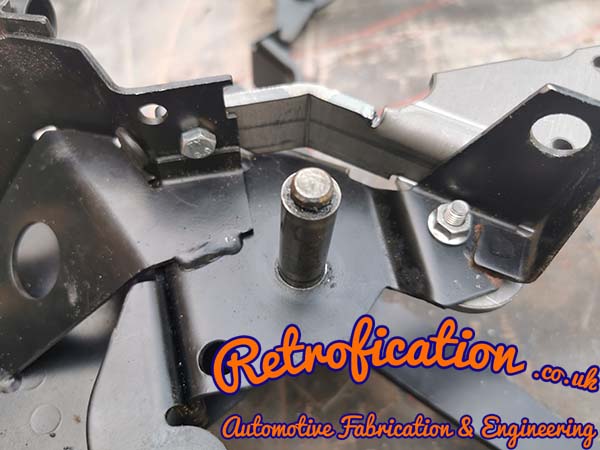
6. Fit the Clevis pin as shown, making sure it is butted up against the end of the slot in the pedal.
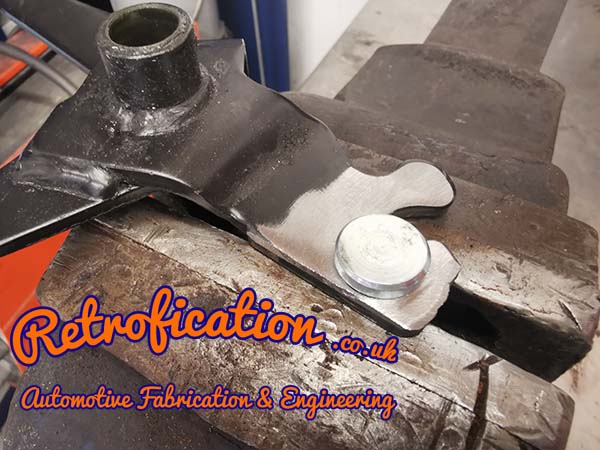
7. Weld the Clevis pin to the pedal as seen (If you can not weld, you can send us your clutch pedal and we will weld it on for you, free of charge). At this point it would be a good idea to apply some back spray paint to stop it corroding.
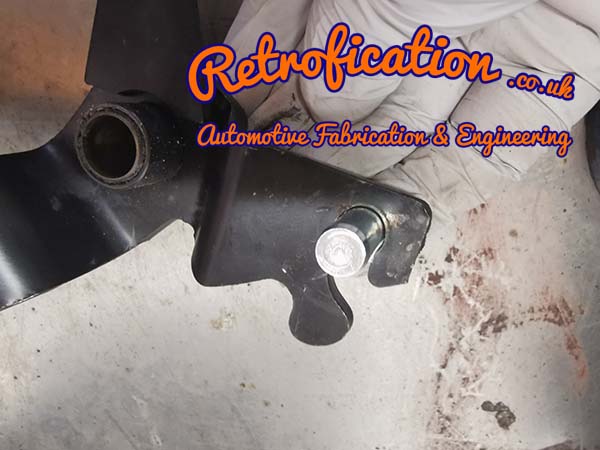
8. Re-fit the clutch pedal
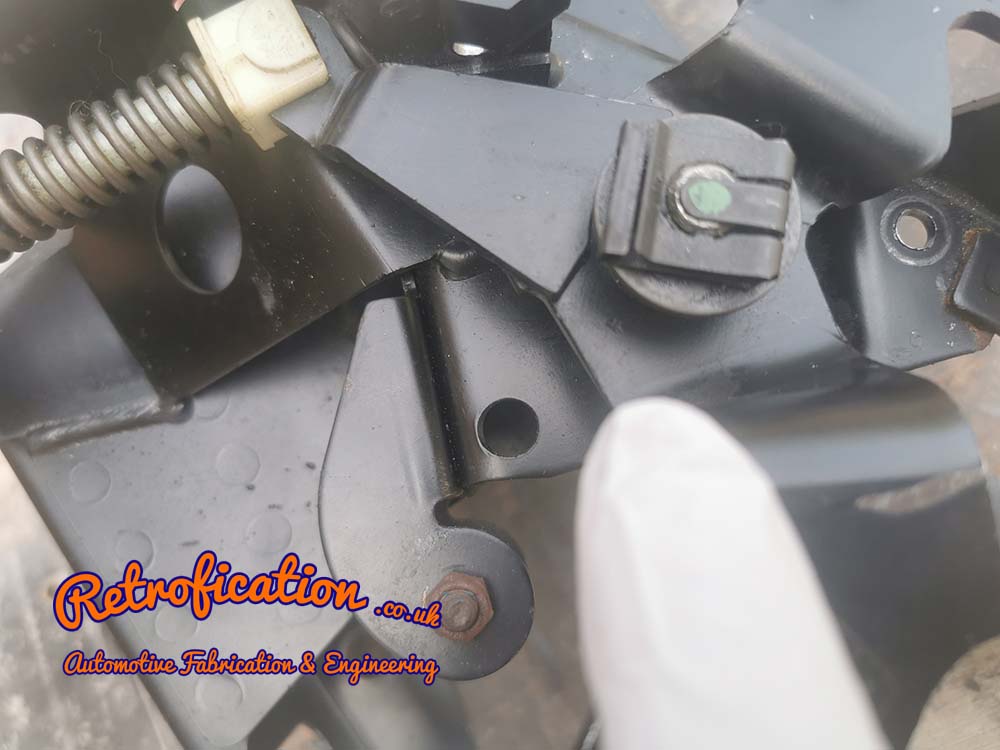
9. Loosely bolt the the main bracket to the support bracket (this can be done later on if you prefer at step 15).
10. Loosely bolt the master cylinder to the bracket.
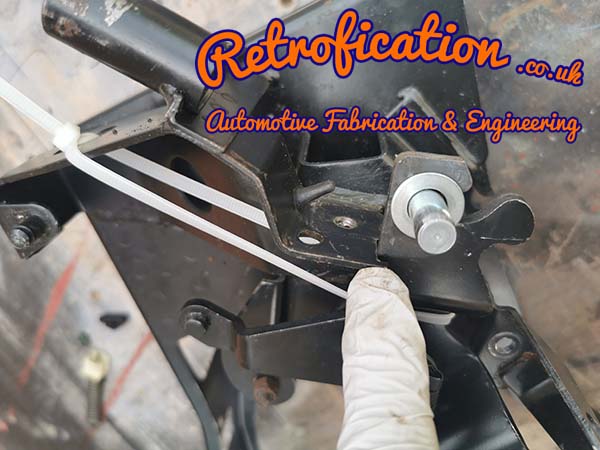
11. Slip one of the supplied M10 washers over the clevis pin
12. Cable tie the clutch pedal so that it is up tight against the bump stop. We have omitted the plastic bump stop on our conversion as they are more often than not missing anyway! Plus with the plastic bump stop fitted the pedals never line up correctly which looks and feels wrong (even when the brake pedal clevis is adjusted)!
13. Now offer up the master cylinder & bracket. This will now give you the correct position to drill the two 6mm holes needed in your pedalbox.
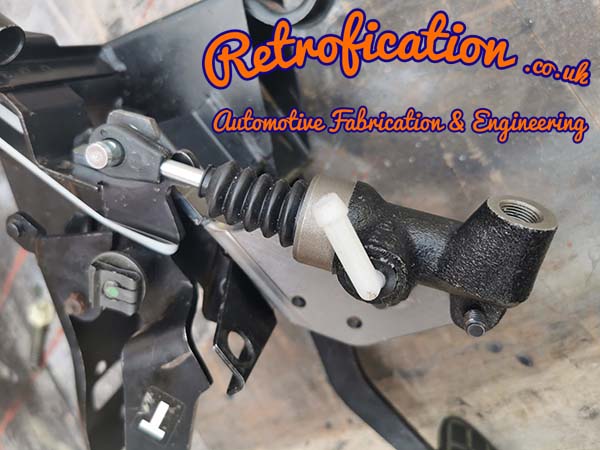
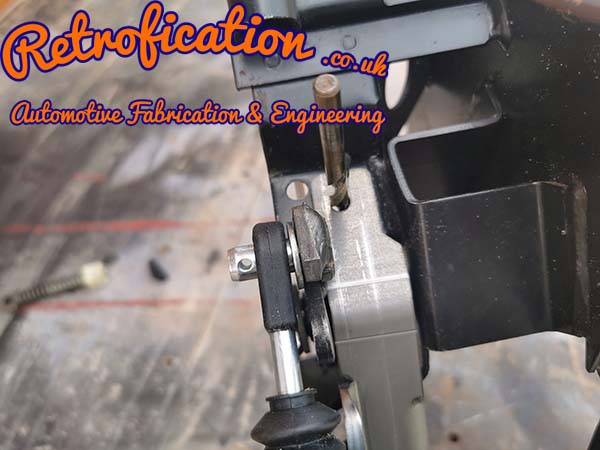
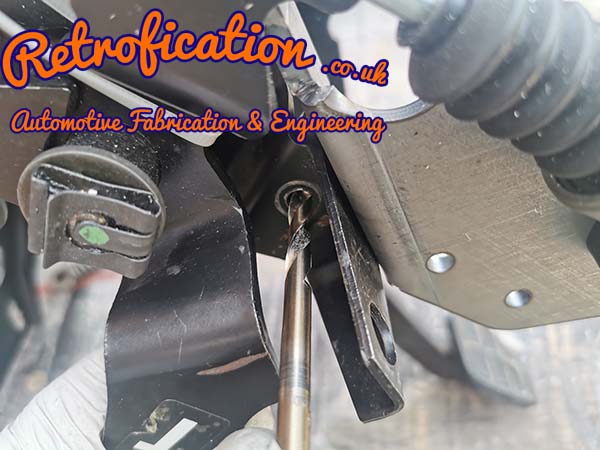
14. Bolt up the 2 bolts holding the bracket to your pedalbox and check the operation.
15. Now bolt up the support bracket as shown (if you have not already done so)
PICTURE TO FOLLOW
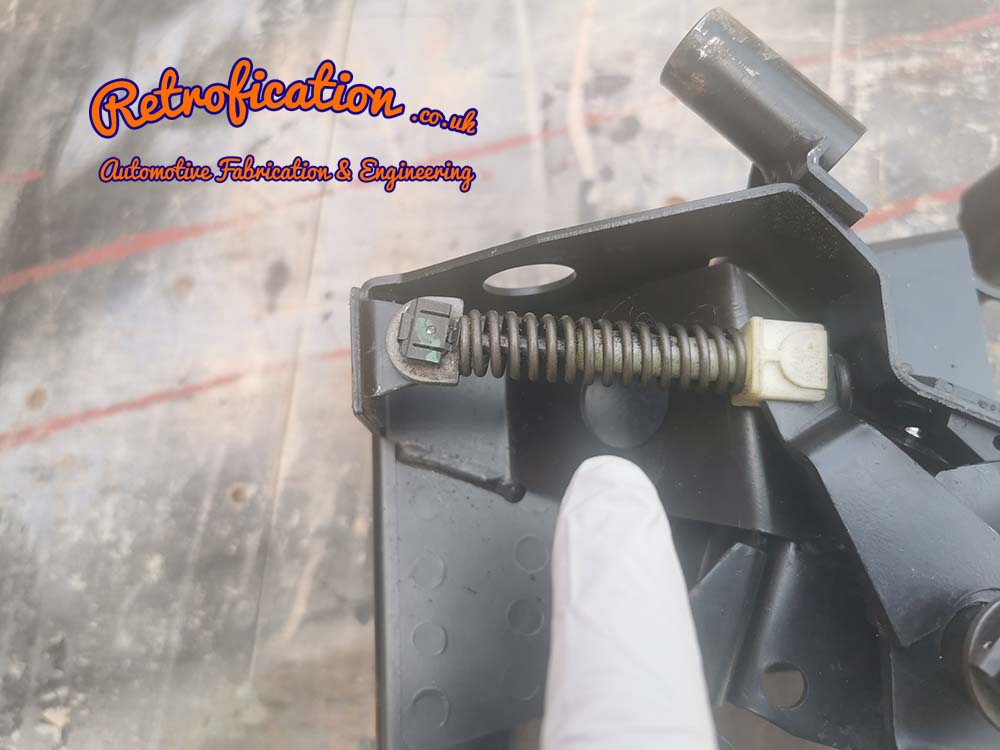
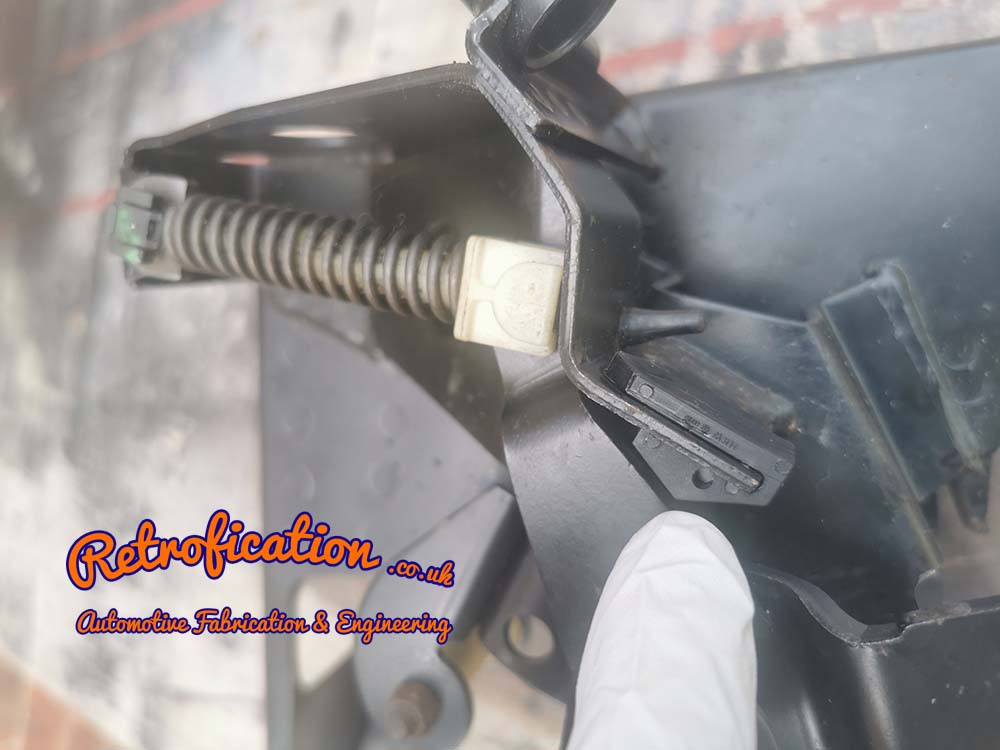
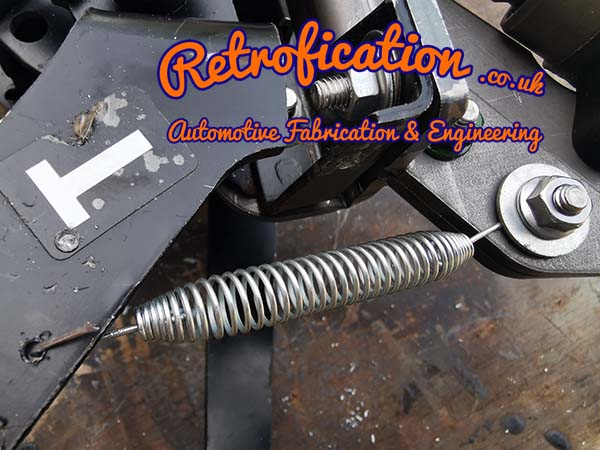
16. We have added a return spring to our conversion, not only does this give a much better pedal feel, it also aids bleeding the clutch. Bolt one end of the spring as shown in the picture below. Now drill a 3mm hole in the pedal as shown. The exact position will vary, but you will want the spring under slight tension when it is at rest.
17. At this stage, it would be a good time to give the two brackets a lick of paint with a rattle can!
18. Once finally reassembled, connect the brake fluid feed hose to the master cylinder. You can now, if you wish feed the hose up though the tube that the original clutch cable came through. We prefer this method as it allows you to mount the reservoir in the rain scuttle, making checking and topping up the fluid an easy task. Although I would recommend using some PU sealer (or similar) at the top and bottom of the tube to help stop chaffing, plus it will also seal of the tube from any potential water ingress.
PICS TO FOLLOW
19. Connect the supplied braided hose to the banjo (see video below) and bolt to the master cylinder as seen. We then also prefer to route this over to the passenger side behind the heater box and use any of the numerous rubber grommets on the passenger side of the bulkhead. This is a neater solution and also means that you will not need to run the braided hose in close proximity of a turbo (if fitted).
This video will show you how to connect the stainless steel banjos to the braided hose
20. Once you have fed the braided hose through you chosen grommet, you can now attach the swivel fitting (02M 6sp) or banjo (02A/J 5sp) at the gearbox end.
21. Now fill the system with brake fluid, bleed & enjoy!

