MK3 caddy (2k) Rear Lowering Axle Flip
25 September 2017 | Admin
Before you read on please note that the spring saddles have been redesigned for 2019. The new design makes alignment easier and the saddle no longer gets in the way of the damper bolt!
Some changes to note compared to the pictures:
1. The new design saddles require welding at the side of the saddles and not at the ends as in the pics below
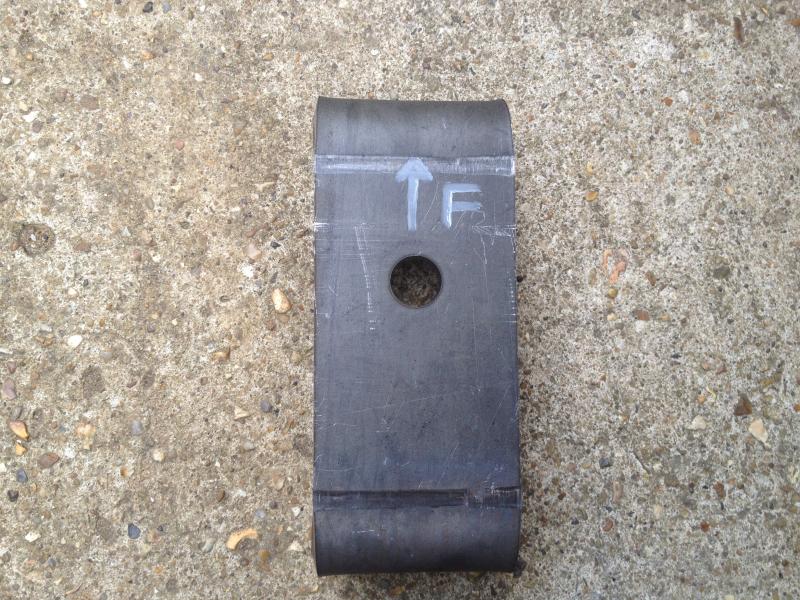
2. The forward "F" is now engraved in the saddle
3. The two holes allow for the offset hole to be used to centralise the axle once re-located
“How To” Axle Flip a MK3 Caddy 2K the proper way, with the Just Caddys Saddle & Shackle kit
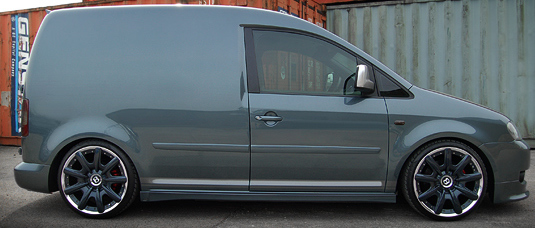
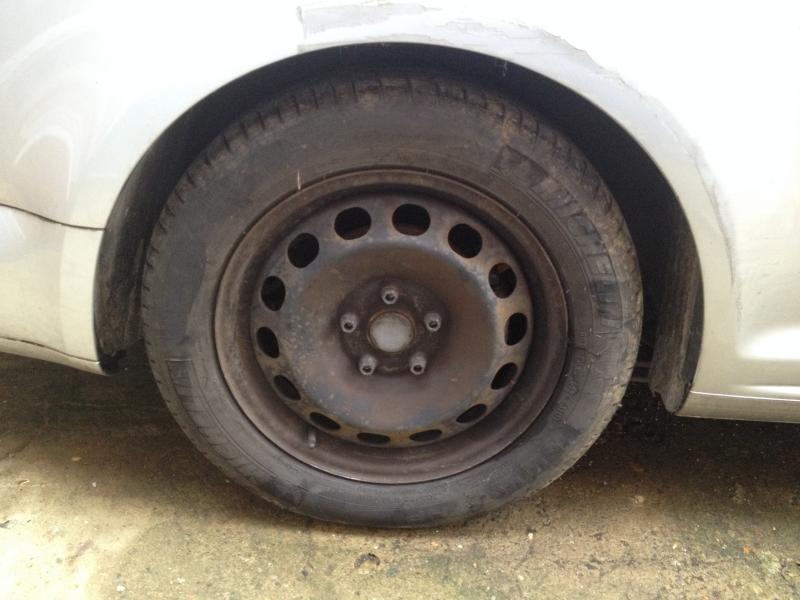
Up until now your only option was to use the very heavy lowering brackets, which apart from added 8kgs of un-sprung weight, they also push the wheels forwards in the arch which can lead to rubbing on the leading edge, this also looks wrong as demonstrated on the Caddy below
A very nice Caddy spoiled by the rear wheel position
Also due to the nature of the brackets they can allow the axle to move around more than normal. I have also heard of horror stories of them moving considerably, but I have never encountered this myself and put it down to poor fitment or abuse.
Many years ago I developed the weld-on offset spring saddles for the previous marques of Caddy and these have become the standard in lowering the rear of Caddys, known as an axle flip. Or as I prefer to call it an “Axle relocation”.
The weld-on saddles are a fit and forget modification, so once welded up and fitted they require no further maintenance. And because they are welded they will never move like the bolt-on brackets have a tendency to do! Some may argue that relocating the axle on top of the leaf springs reduces payload! This is complete bull shit! Car manufactures have been locating axles on top of the leaf springs ever since; well forever!
Payload will of course be reduced to some degree, but this has nothing to do with the axle location, your limitation will be based on your ride height and wheel/tyre choice as you will bottom out or rub tyres before anything is close to failing!
How to fit your “Just Caddys” Spring Saddles
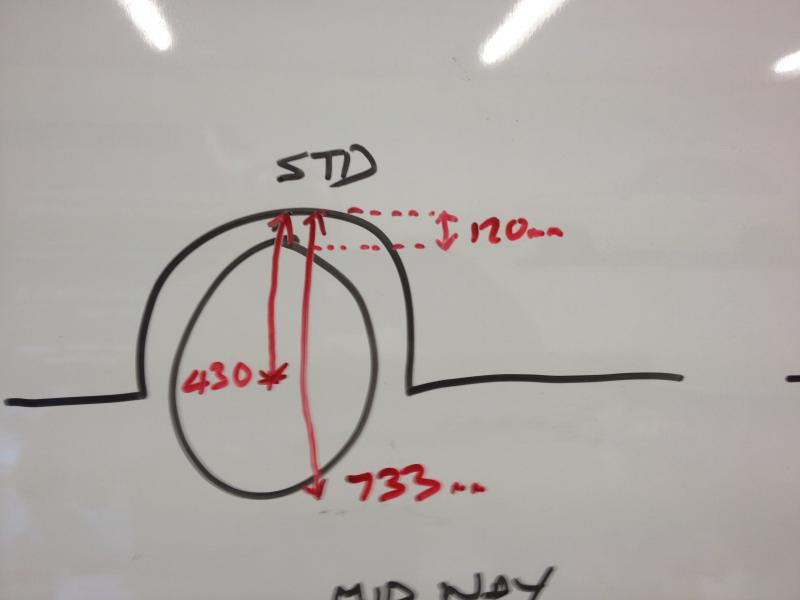
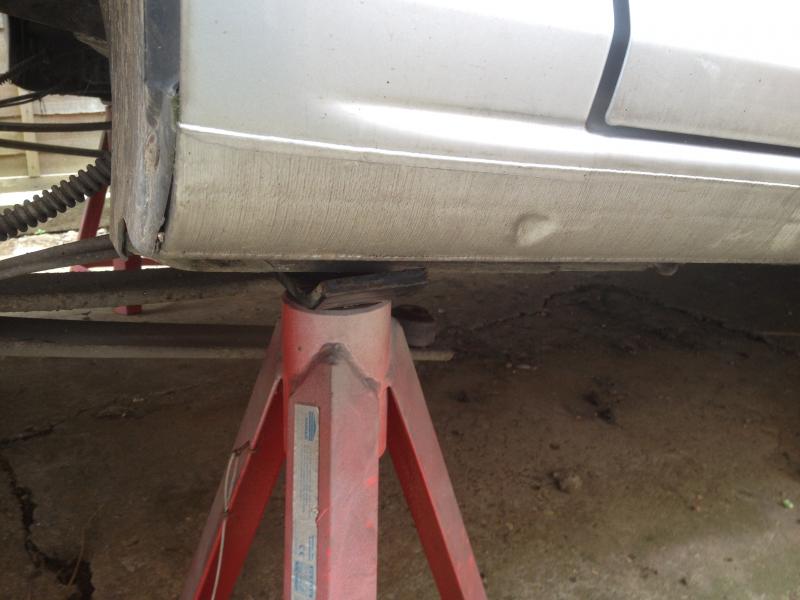
Before we start here are some pics and approx dimensions of a standard ride height 2008 Maxi
All measurements in the "How To" are approx and based on the std 16" rims & tyres
I wont go in great detail and will only cover the basics, but will point out important points as I go.
1. Secure Chassis on Axle stands (not on the axle)
2. Remove Wheels
3. Place a trolley jack under the centre of the axle so it just removes the droop in the suspension
4. Remove lower Damper/Shock Absorber bolts (18mm)
5. Undo all 8 U-Bolt bolts, and remove U-bolts & clamps
Removed
6. Once the U-Bolts have been removed, lower the jack approx 25mm below the axle. Then kick downwards at the axle ends, this should now release the axle away from the leaf springs and should now be resting on the jack. Sometimes a bit of force and prying will be required as the locating pin rusts into the saddle hole.
Important: At this point do not let the axle down to low otherwise you will put strain on the brake hoses, cables & wiring
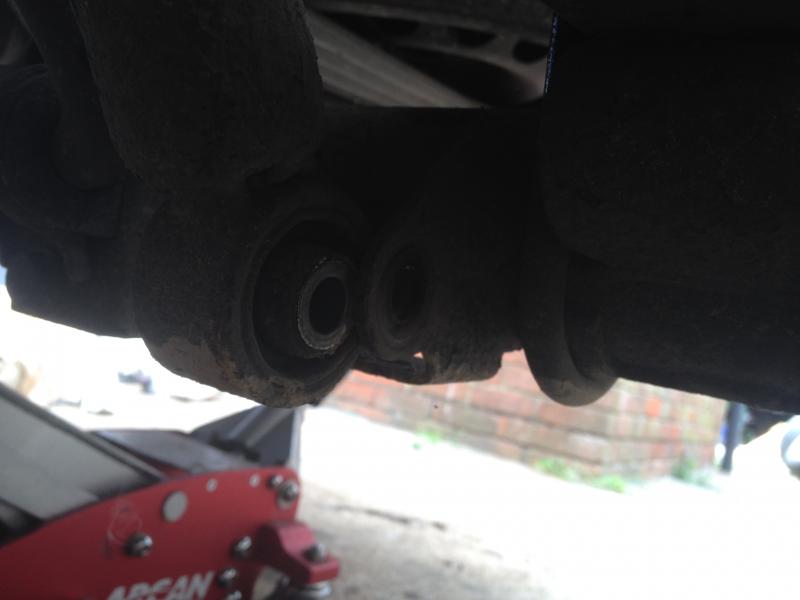
Axle now separated from the leaf springs
7. Now remove the leaf springs and shackles (Make a note of the front of the leaf springs and the side it was removed from so you have a reference when re-fitting them). Also you will have to remove the rubber grommets from the chassis to enable you to get the bolts out.

8. If replacing the rear dampers for shorter items (recommended) then remove the old units now.
9. Cut down the bump stops, I personally cut off 2 segments with a hacksaw or similar
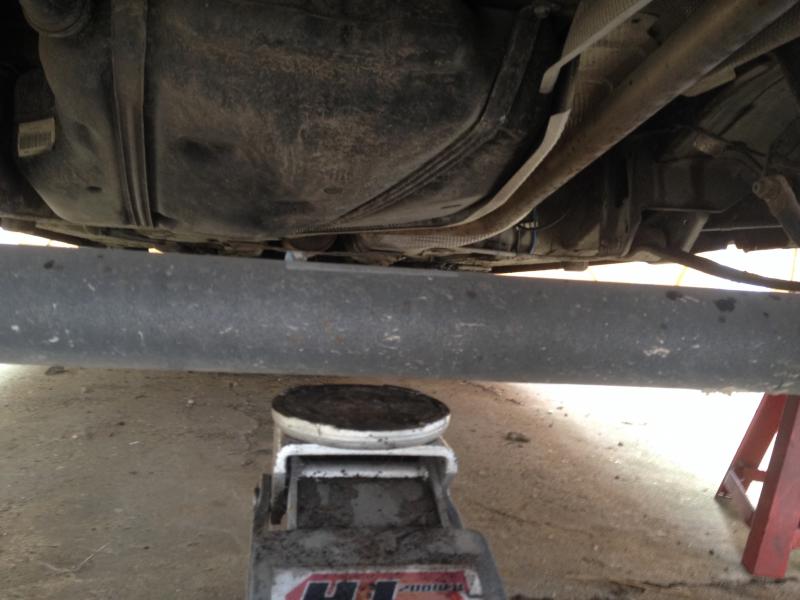
10. Cut of the bracket in the picture below and grind the surface smooth (be careful of any grinder fall out hitting other objects or vehicle paintwork).
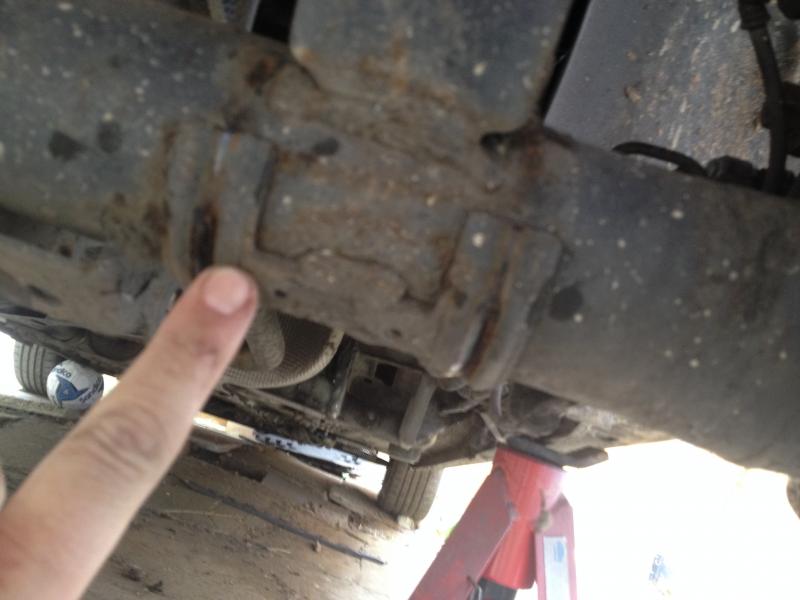
Removed.
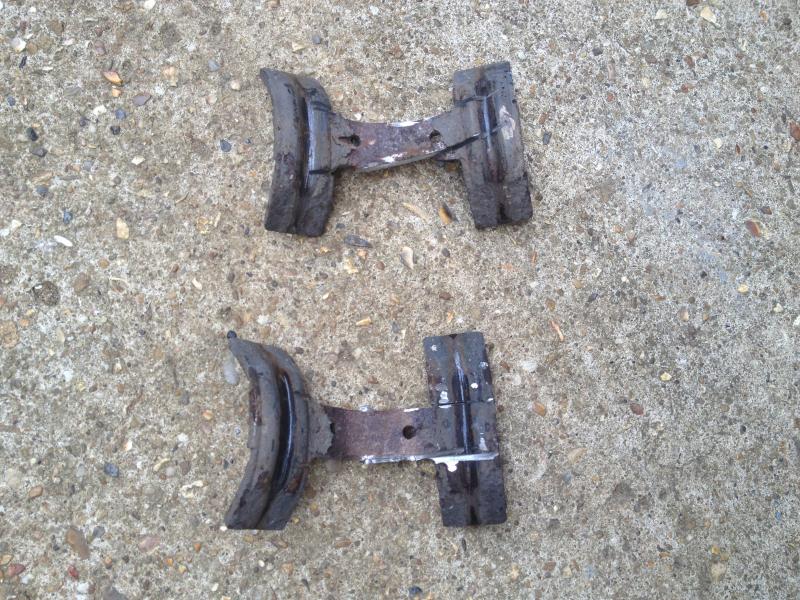
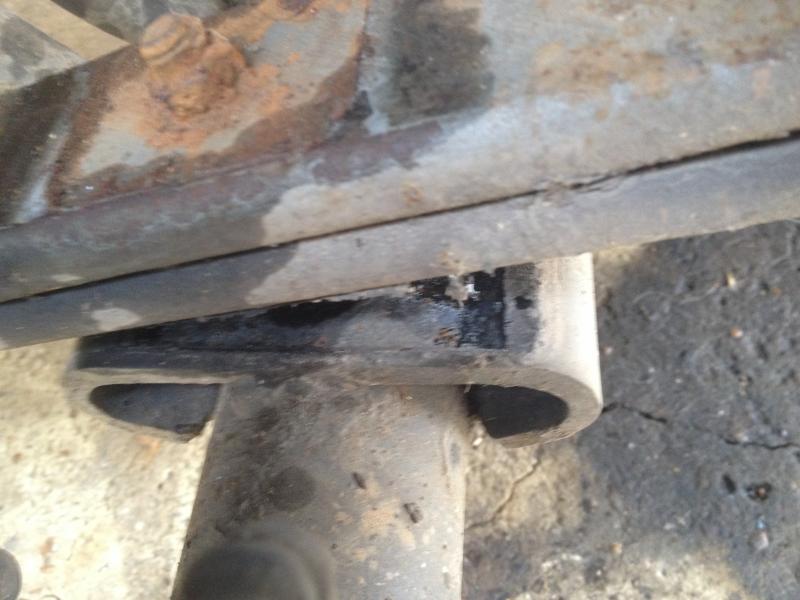
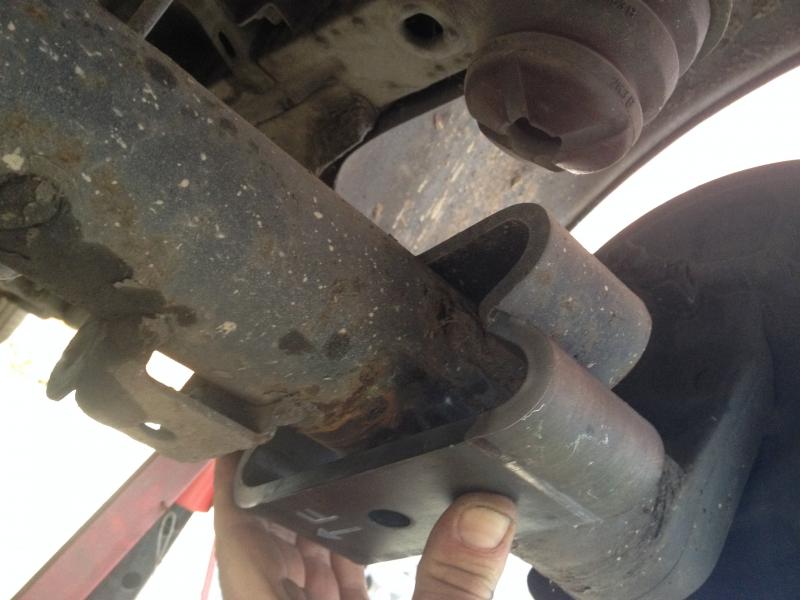
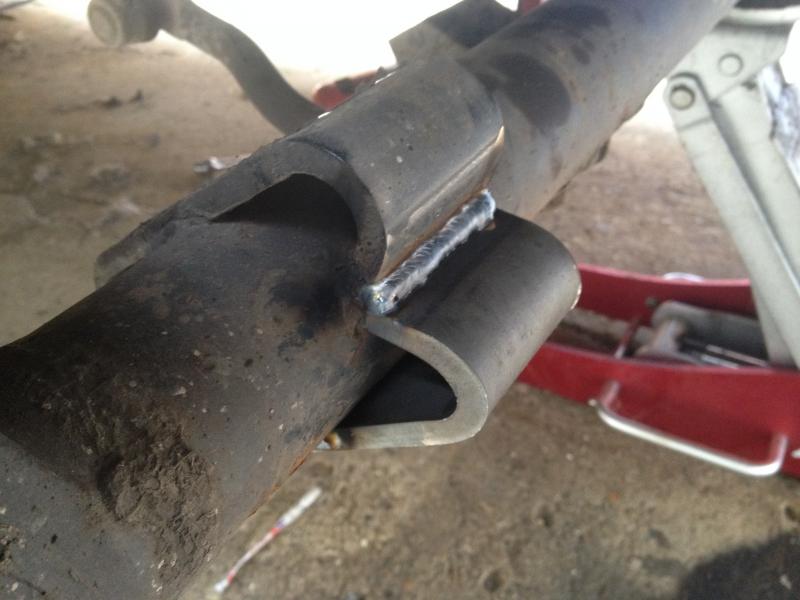
11. Now offer up the offset spring saddle so that the offset hole is towards the front of the Caddy
(PLEASE NOTE. The picture is of the older design saddle. The new design has the "F" for forwards etched into the saddle)
12. Mark the original spring saddle where the new one touches it, and then remove the paint in preparation for welding
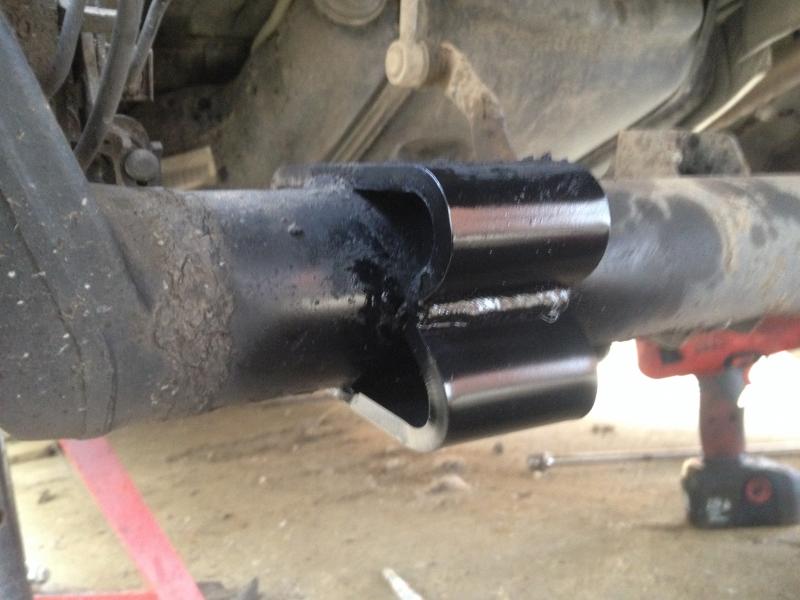
13. Again offer up the saddle and once your happy with the position, tack weld it on. Now check the position again and then fully weld in place along the edge that touches the original saddle. Do this on both sides. Once this is all welded up you can paint to he stop corrosion
14. Now remove the locating pin that holds the leaf springs together. The locating pin is currently on the underside of the leaf springs, now put the pin back in from the topside and tighten the nut making sure the assister leaf is in alignment with the main leaf. Once the nut is tightened then cut off the excess thread that is protruding from the nut. If you do not cut off the excess of of the thread the U-bolt plate will not be able to sit correctly in the offset position.
(PLEASE NOTE: On the 2010 onward's single leaf spring models it is no longer a threaded pin with a nut. On these the pin is pressed into the leaf spring. You will need to remove this pin with vise grips or similar so it can be fitted to the opposite side of the spring.
15. Now jack the axle upwards giving space for the leaf springs
16. Re-attach the leaf springs to the Caddy with the adjustable Shackles DO NOT FULLY TIGHTEN but tighten to reduce any slack in the nuts & bolts (if you don’t use the extended adjustable shackles you Caddy will most likely be far too low for 99% of you)! I suggest you start at a midway point on the shackles so once lowered to the ground you can then work out if it needs to be raised or lowered.
17. Now you can lower the jack so now that the axle is resting on the leaf springs. You can now locate the hole in the axle saddle over the locating pin on the leaf spring.
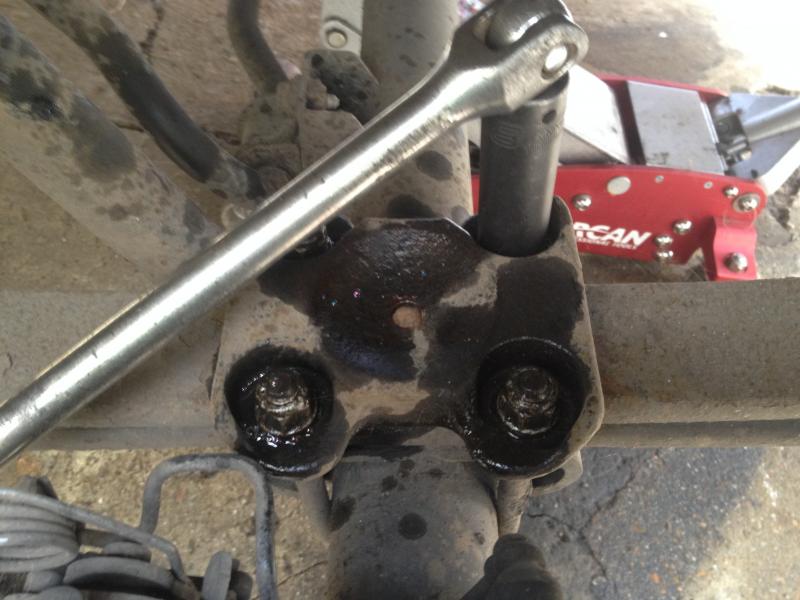
18. Once the axle is located refit the U-Bolts & clamp & tighten, making sure everything is square.
Note: U-bolts now fit top to bottom
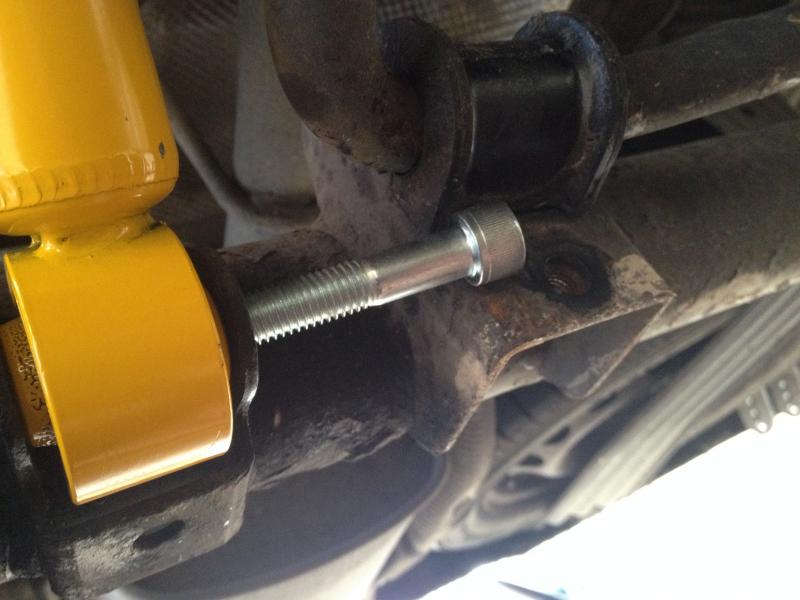
19. Re-fit the dampers with the supplied hex bolts. Getting the bolt in is tight due to the angle, so the bolt will need winding in a bit with a socket until it passes the anti roll bar mounting. DO NOT FULLY TIGHTEN the dampers just yet
(PLEASE NOTE: With the new saddle design released in 2019 the damper bolt angle is no longer an issue)
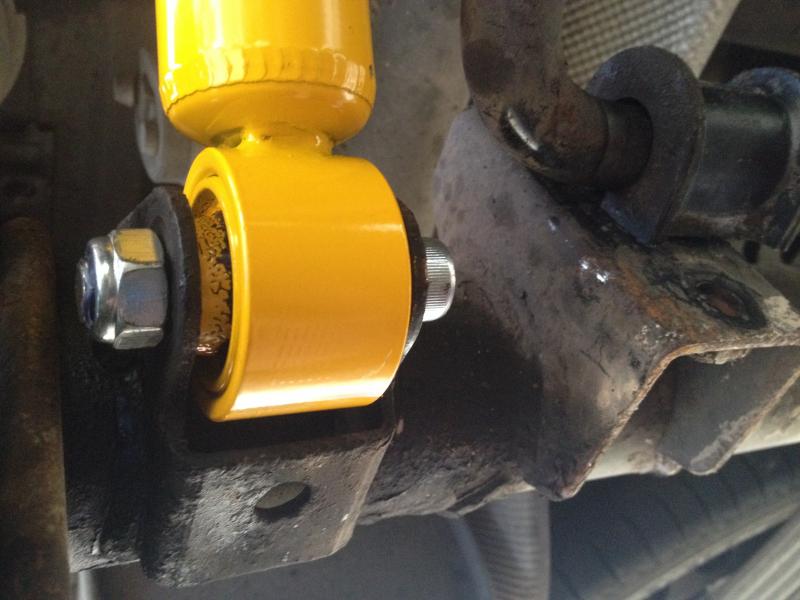
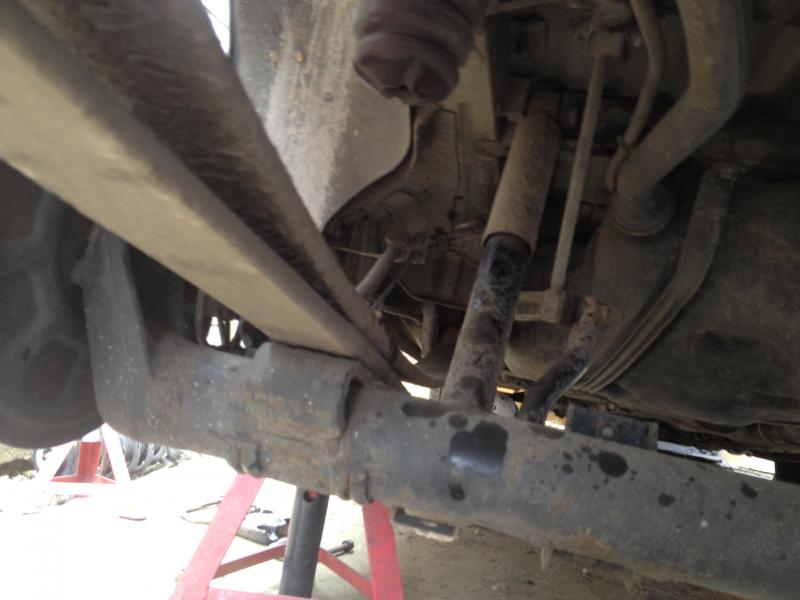
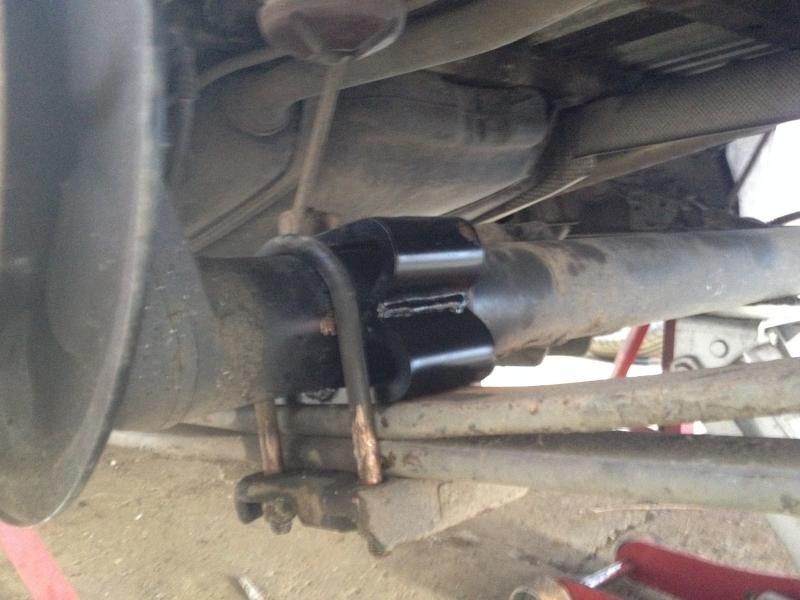
This is how your rear suspension should now look
20. Now lower your Caddy to the floor and admire your efforts. At this point work out which position on the shackles suits your chosen ride height.
21. Once you’re happy with the ride height you now need to tighten fully all the leaf springs, shackles & damper bolts. BUT it is very important that these are tightened whilst the weight of the vehicle is on the suspension. Do this but lowering the wheels onto ramps or the axle onto stands so that you can get underneath. Failure to do this will cause the suspension to bind up and prematurely wear out the rubber bushes. It may also cause the Caddy to sit unevenly.
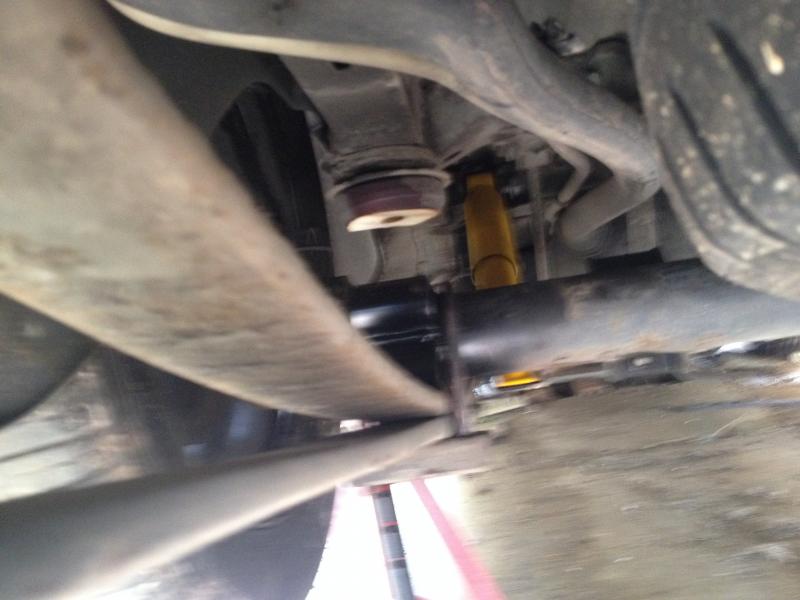
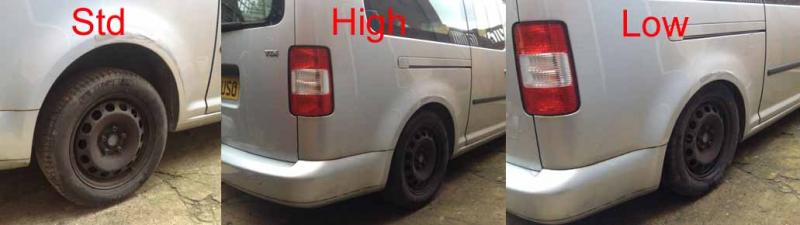
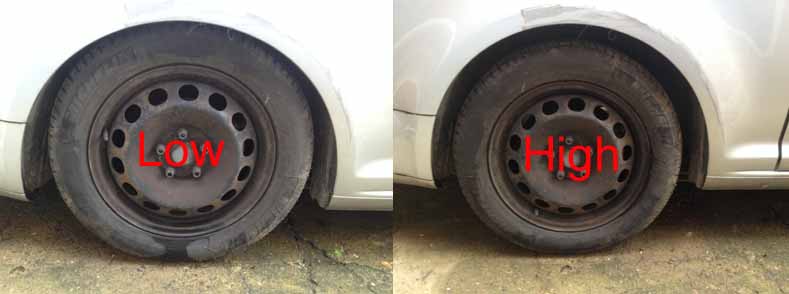
As you can see with our offset saddles, the rear wheels remain centre in the wheel arch
At "Just Caddys" we can offer what you need to lower you 2004 onwards 2K Caddy, so please visit out online shop at www.justcaddys.com
So after reading all the above, you are now wondering how much the saddle & shackles lower you Caddy????
Well as we were putting together this "how to" we took some measurements along the way, these measurements are all approx as they were taken with a tape measure!
On the lowest setting on the shackle the measurement from floor to wheel arch was 610mm, whilst on the highest setting it was measured at 660mm, so the shackles have an adjustment range of approx 45mm, if you compare this to the standard ride height as in the picture above you will see that this kit will lower you Caddy between approx 75 - 120mm
In the real world, this is what that looks like
Since the above we have introduced longer shackles, which are more suited to the Maxi or Life models, or just if you need it that bit higher to carry extra weight etc.
Please see the shop for more info, or contact us if you are unsure

